|
TipcProcessCB is included in this section for completeness only. TIBCO recommends that you use events and event handlers instead.
|
This section provides a procedure to write a simple C# SmartSockets program in Visual Studio .NET and descriptions of the classes used in the example.
The first part of the SmartSockets program invokes a connection to an RTserver and sets up the delegates that will process messages and errors from the server. The second part sends and receives a message to and from a subscribing RTclient.
This section briefly describes the classes used in the example program, which follows. For detailed information about all SmartSockets Classes, Events, and Delegates for .NET, see TIBCO SmartSockets .NET API Reference (HTML only).
The TipcMt methods create and retrieve information about message types, which are templates for messages. Many of the constants associated with TipcMt can be found in TipcMt fields; for example, the message type number for an “info” message would be TipcMt_Fields.INFO.
The TipcMsg methods construct, manipulate and destroy messages as well as constructing and accessing the fields in the data section of a message.
TipcSvc is a static factory class for creating instances of the TipcMt, TipcMsg, TipcConnClient, TipcConnServer, and TipcSrv classes. Objects of the required concrete classes that are created with this factory class.
TipcMsgEvent occurs when a message is processed, as in TipcSrv.mainloop.
Connection process events are raised while processing a message. This callback type is the most frequently used. A process delegate method is called for every of message received. When any message of any type is processed by calling process or mainLoop, the process callback is called.
Represents the method that will handle the TipcMsgEvent event.
This class contains event data for the TipcMsgEvent.
TipcSrv methods communicate with RTserver to receive and process messages, for example, TipcSrv.mainLoop
Superclass of all SmartSockets exceptions. This class defines an error number which may be set for some errors.
The TipcDefs structure contains constants used across all classes.
Example: TipcDefs.CONN_FULL
The user interface for connection process callbacks.
Connection process callbacks are executed while processing a message. This callback type is the most frequently used. A process callback can be called for a specific type of message, on a specific subject (destination), or created globally and called for all messages. For example, a process callback can be created for the INFO message type. When any message of that type is processed by calling process or mainLoop, the process callback is called. If the process callback is created globally, it is called for all INFO messages as well as any other type of message.
|
TipcProcessCB is included in this section for completeness only. TIBCO recommends that you use events and event handlers instead.
|
Before you begin, start a new Visual C# Windows Application project and add the TIBCO.SS reference. (See Referencing the TIBCO SmartSockets .NET Assembly)
Perform these steps to create the RTserver connection program:
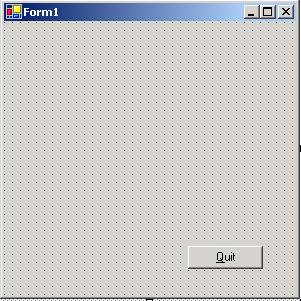
Quit. The button changes in real-time, reflecting what you type—the button should now have the label Quit.
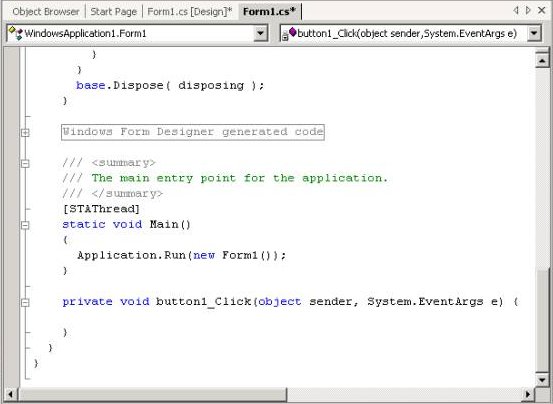
   private bool running = false;
   Application.Exit();,
Indent just as you would when writing other programs.
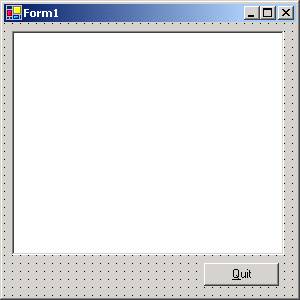
The resulting window should be similar to the one in Figure 4.
   using System;
   using System.Drawing;
   using System.Collections;
   using System.ComponentModel;
   using System.Windows.Forms;
   using System.Data;
   using TIBCO.SMARTSOCKETS;
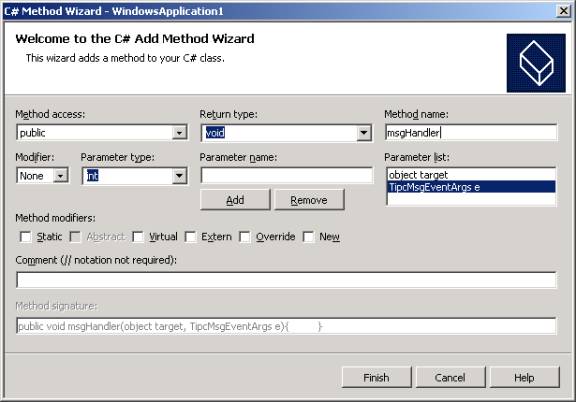
publicvoidmsgHandlerobject targetTipcMsgEventArgs eThe C# Method Wizard window should look similar to the one shown in Figure 5.
msgHandler such that the method looks like this:
   public void msgHandler(object target, TipcMsgEventArgs e) {

      try {
         TipcMsg msgOut = TipcSvc.createMsg(TipcMt_Fields.INFO);
         msgOut.Dest = e.Msg.Sender;
         msgOut.appendStr("Message Received!");
         Srv.send(msgOut);
         Srv.flush();
      }

      catch (TipcException ex) {
         MessageBox.Show(ex.Message, "msgHandler:  Exception",
            MessageBoxButtons.OK, MessageBoxIcon.Exclamation);
      }

   }
msgHandler_Hail. msgHandler_Hail such that the method looks like this:
   public void msgHandler_Hail(object target, TipcMsgEventArgs e) {

      try {
         if (e.Msg.Type.Num == TipcMt_Fields.INFO &&
            e.Msg.Dest.CompareTo("/hail") == 0) {
            this.textBox1.Text += e.Msg.nextStr() +
                                 System.Environment.NewLine;
         } // if
      }
      catch (Exception ex) {
         MessageBox.Show(ex.Message, "msgHandlerHail:  Exception",
            MessageBoxButtons.OK, MessageBoxIcon.Exclamation);
      }

      }
public Form1()
{
   //
   // Required for Windows Form Designer support
   //
   InitializeComponent();

    try {
     Srv = TipcSvc.Srv;
     Srv.setOption("ss.unique_subject", "/cs_example");
     Srv.setOption("ss.server_names", "tcp:_node");

     /* add the delegates */
     Srv.TipcMsgEvent += new TipcMsgHandler(this.msgHandler);
     Srv.TipcMsgEvent += new TipcMsgHandler(this.msgHandler_Hail);

     Srv.create(TipcDefs.CONN_FULL);
     Srv.setSubjectSubscribe("/hail", true);
    }
    catch (Exception ex) {
     MessageBox.Show(ex.Message, "msgHandlerHail:  Exception",
       MessageBoxButtons.OK, MessageBoxIcon.Exclamation);
         Application.Exit();
    }
}
private void Form1_Activated(object sender, System.EventArgs e) {
|
Note, the recommended method of handling the SmartSockets event loop (TipcSrv.mainLoop) is through another thread. The Form1_Activated event was used only for simplicity and brevity. |
–runtime option from the SmartSockets command prompt. MON>connect09:01:10: TAL-SS-00088-I Connecting to project <rtworks> on <tcp:_node:5555> RTserver 09:01:10: TAL-SS-00089-I Using tcp protocol 09:01:10: TAL-SS-00091-I Message from RTserver: Connection established. 09:01:10: TAL-SS-00096-I Start subscribing to subject </_CLSLAP01_2108> 09:01:10: TAL-SS-00111-I Start subscribing to subject </_CLSLAP01> 09:01:10: TAL-SS-00111-I Start subscribing to subject </_all> 09:01:10: TAL-SS-00111-I Start subscribing to subject </_mon> MON>send info /hail "Hello!"Sent info message to /hail subject. MON>run 1 1Received an unexpected message.
|
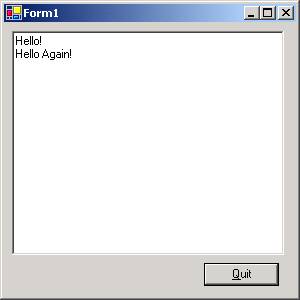
The message below is what was constructed and sent back to RTmonitor in the msgHandler delegate. The messageHandler_Hail delegate displays the message contents in Form1’s text box. |
type = info
sender = </cs_example>
sending server = </_CLSLAP01_2008>
dest = </_CLSLAP01_2108>
app = <rtworks>
max = 2048
size = 40
current = 0
read_only = false
priority = 0
compression = false
delivery_mode = best_effort
ref_count = 1
seq_num = 0
resend_mode = false
user_prop = 0
arrival_timestamp = 09:02:10
data (num_fields = 1):
  str "Message Received!"
Processed a info message.
MON> send info /hail "Hello Again!"
|
TIBCO SmartSockets™ .NET User’s Guide and Tutorial Software Release 6.8, July 2006 Copyright © TIBCO Software Inc. All rights reserved www.tibco.com |